For the past month I’ve been busy building my Osgiliath
board, which is beginning to take shape. I thought I’d post what I’ve been doing
up to now. To start a new scenery board, the first thing you need is a design.
I tried to base the board roughly on the scenes around the last attack on
Osgiliath featured in the ROTK film. It had to include a river wide enough to
stage an assault, an embankment complete with arches, main roads, alleyways,
crumbled towers and a main square as a final objective. Once I had this in
mind, I went out and bought some 2’ x 4’ MDF boards from a local builder’s
supplier, 4 to be exact. These were more expensive than I remembered them being
a few years ago, so I went for the thinnest boards I could find with the knowledge
they would be strengthened later. After this, I set them up in pairs to make 4’
squares, attaching them together with wood.


The next step was to place on top a sheet of insulation
foam, which I bought from the same supplier. At an inch think, it was perfect
for creating the rise along the embankment, and with the left over 18”, I could
make some ruins, rubble, whatever. Foam is a lot easier to model with as
opposed to polystyrene, it’s less brittle, and easier to imprint detail.


After that was stuck down with PVA, the bridge was the next
step. Once the bridge was out of the way, the road could be laid, followed by
the positioning of the buildings. So, on with the bridge. It was created from 4”
squares of the foam stuck back to back to create a solid object which could
then be modelled into. The arches were made before hand out of smaller pieces
of foam, 4x2” and 1x2”, cut at angles. Once these were stuck together, the
whole object needed to be coated with a filler plaster. This stuff is gold when
it comes to making scenery, as all gaps, joins and other unsightly blemishes
can be smoothed over and covered up. As well as this, it’s easy to draw onto
and score, so brickwork can easily be pencilled on. Thinner modelling foam was
used then as side panels, to create the brickwork. I tend to use 5mm as for
this scale it has a realistic thickness to it, and is durable enough for these
games. They were simply cut into sheets with a very sharp scalpel, and etched with a pencil. I can't stress the importance of a sharp blade enough really. After gluing
them to the sides of the bridge, the bridge itself was stuck onto the board. The bridge had to have a gap in it, to make the game more interesting as there would come a point in the battle where the Mordor reinforcements would have to lower their custom made draw bridge to allow their access. This was simply cut away from the bridge and filled where needed.


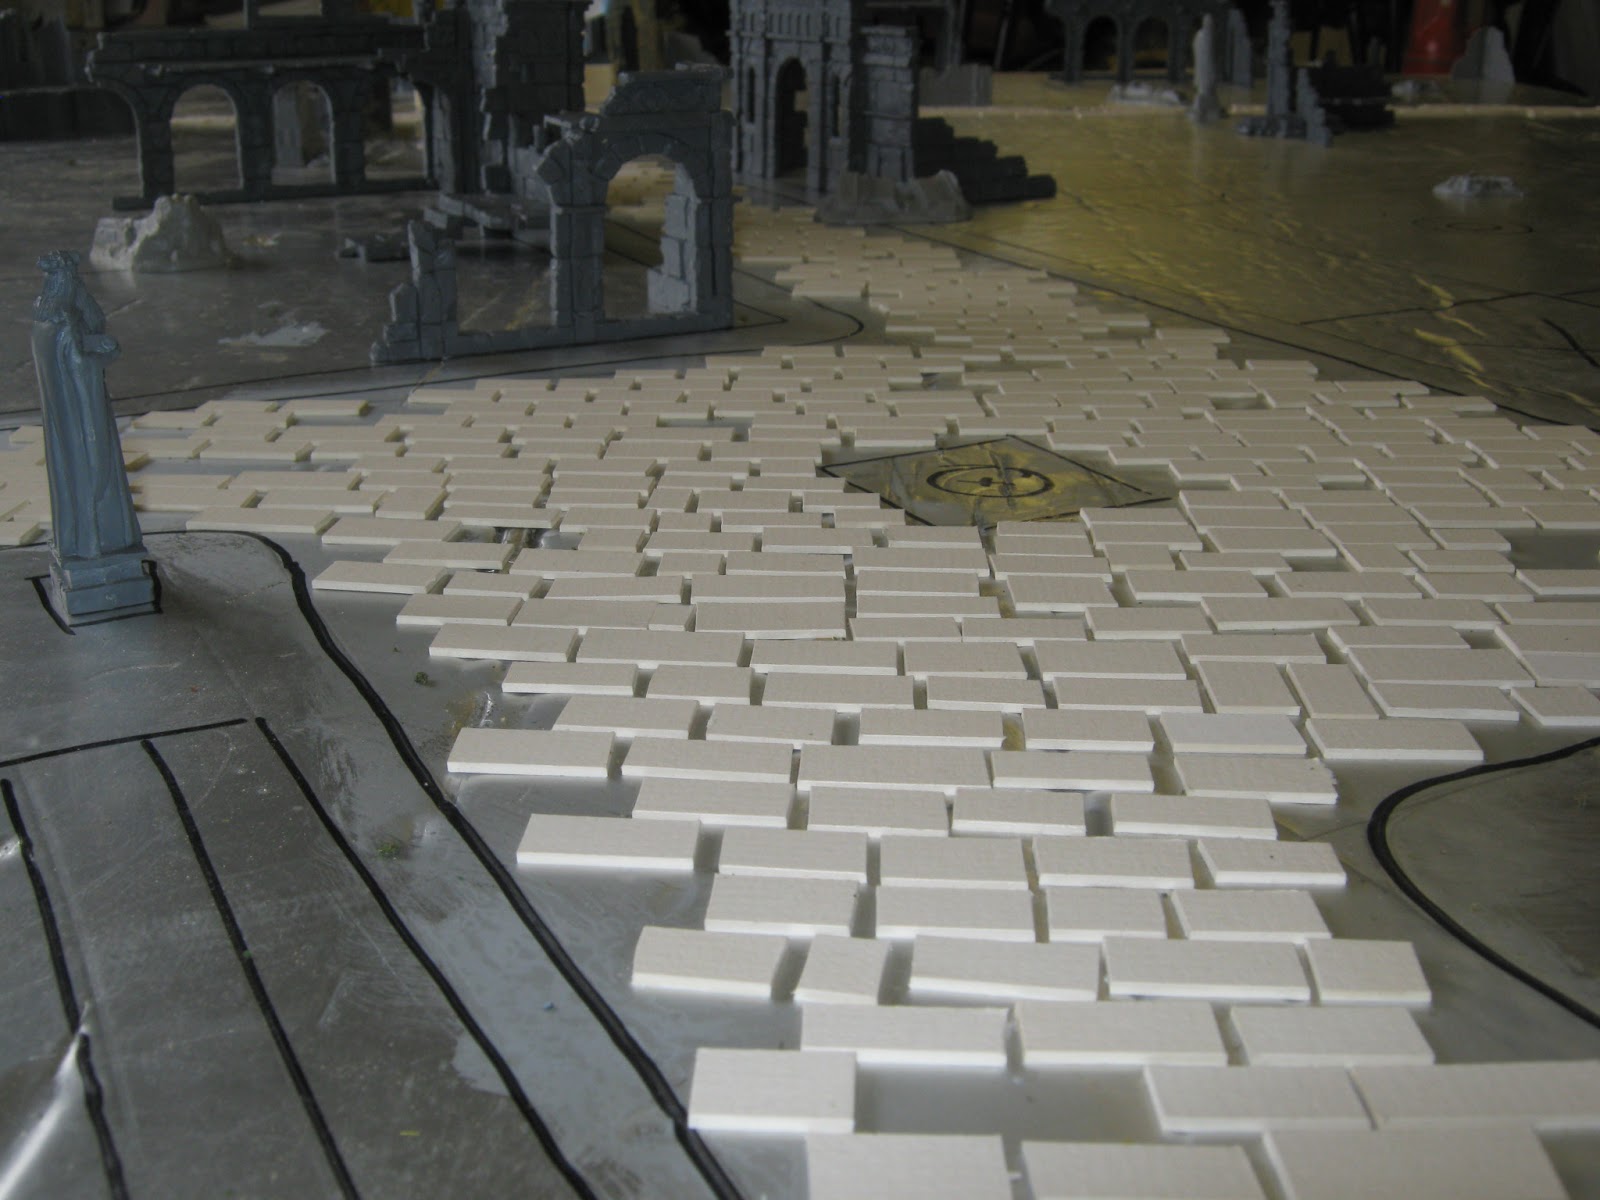
Finally for this stage, the road was laid. There might be
easier ways to do this, but the way I did it was to hand cut hundreds of little
tiles out of thick card and stick them down individually. This whole process
took around 2 hours, excluding drying time. To me they look realistic enough,
especially with the textured card I used.


Price rundown of first stage:
MDF boards £30
Insulation foam £30
Modelling foam £10
Filler £5
Card £3
Total £78
The second stage will consist of building the city itself, with ruins bought from GW as well as home-made ruins. After that the board will have to have sand glued to it, and the river will have to be textured. The third stage will probably consist mainly on painting the board, as well as the little details like grass and moss. You gotta love the little details.